Adding ESLint and Cypress to a New Angular Project
In this blog post I want to describe how Cypress and ESLint can be added to a new Angular project.
Table of content
Angular currently comes without any linting tool and without an end-to-end testing tool as protractor is not included in Angular anymore and TSLint is marked as deprecated.
As a replacement, Cypress and ESLint jump into place to fill this gap. Cypress is the go-to tool for end-to-end testing here, and ESLint can replace the deprecated TSLint.
In this article, we will cover how we can add Cypress and ESLint to a new Angular Project. We will also briefly cover a migration from TSLint to ESLint.
Creating a new project
#Angular tip of the day:
— Stephen Fluin (@stephenfluin) September 16, 2021
Instead of `ng new <my-project>` you should always `npx @angular/cli new <my-project>`.
This makes sure you always create new projects with the latest angular CLI. pic.twitter.com/5cJOMapxy2
With this tweet from Stephen Fluin I learned that if you always want to have the latest version of Angular when starting a new project, you can use
npx @angular/cli new <my-project>
instead of the standard
ng new <my-project>
Doing this brings us the following folder structure with the latest versions:
├── src
│   └── ...
├── .browserslistrc
├── .editorconfig
├── .gitignore
├── angular.json
├── karma.conf.js
├── package-lock.json
├── package.json
├── README.md
├── tsconfig.app.json
├── tsconfig.json
└── tsconfig.spec.json
At the time of writing, the Angular Version is 12.2.0. So we will ride with that for this post.
Adding ESLint to an Angular Project
Adding ESLint is done by using the schematics James Henry is maintaining on GitHub: https://github.com/angular-eslint/angular-eslint
Also, this video helps a lot when migrating or adding ESLint to your Angular project.
You can add ESLint by using the schematics with
ng add @angular-eslint/schematics
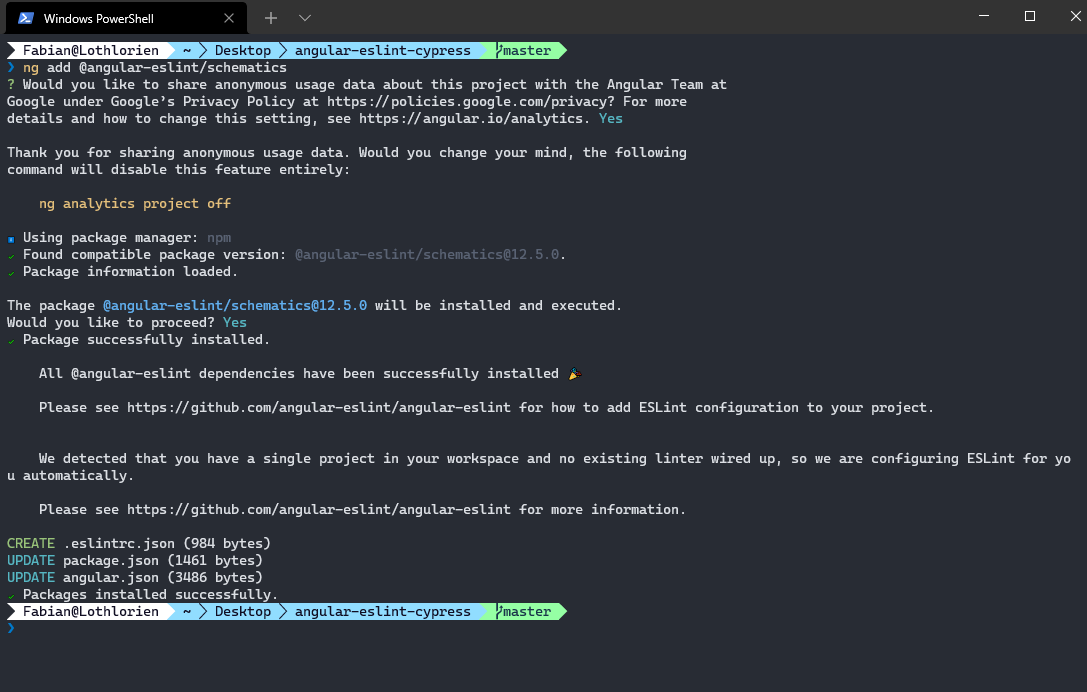
After you have done this, your package.json is showing those changes. A lint script and the dependencies have been added.
{
  "name": "angular-eslint-cypress",
  "version": "0.0.0",
  "scripts": {
    // ...
    "lint": "ng lint"
  },
  "private": true,
  "dependencies": {
    // ...
  },
  "devDependencies": {
    // ...
    "@angular-eslint/builder": "12.5.0",
    "@angular-eslint/eslint-plugin": "12.5.0",
    "@angular-eslint/eslint-plugin-template": "12.5.0",
    "@angular-eslint/schematics": "12.5.0",
    "@angular-eslint/template-parser": "12.5.0",
    // ...
    "@typescript-eslint/eslint-plugin": "4.28.2",
    "@typescript-eslint/parser": "4.28.2",
    "eslint": "^7.26.0"
    // ...
  }
}
(I pointed out only the changes here).
The angular.json has changes as well. A lint property was added with the appropriate builders.
{
  // ...
  "cli": {
    "defaultCollection": "@angular-eslint/schematics"
  },
  // ...
  "projects": {
    "angular-eslint-cypress": {
      // ...
      "architect": {
        "build": {
          // ...
        },
        "serve": {
          // ...
        },
        "extract-i18n": {
          // ...
        },
        "test": {
          // ...
        },
        "lint": {
          "builder": "@angular-eslint/builder:lint",
          "options": {
            "lintFilePatterns": ["src/**/*.ts", "src/**/*.html"]
          }
        }
      }
    }
  }
}
In the end a new .eslintrc.json was added as well containing all the rules.
.
├── src
│   └── ...
├── .browserslistrc
├── .editorconfig
├── .eslintrc.json  // <-- Was added!
├── .gitignore
├── angular.json
├── karma.conf.js
├── package-lock.json
├── package.json
├── README.md
├── tsconfig.app.json
├── tsconfig.json
└── tsconfig.spec.json
You can now apply rules from @angular-eslint/, @typescript-eslint/... or the standard rules from ESLint.
{
  // ...
    "rules": {
        "@angular-eslint/...": [...],
        "@typescript-eslint/...": [...],
        "newline-before-return": "error",
        "max-len": "off",
        "no-useless-constructor": "off",
    }

  // ...
}
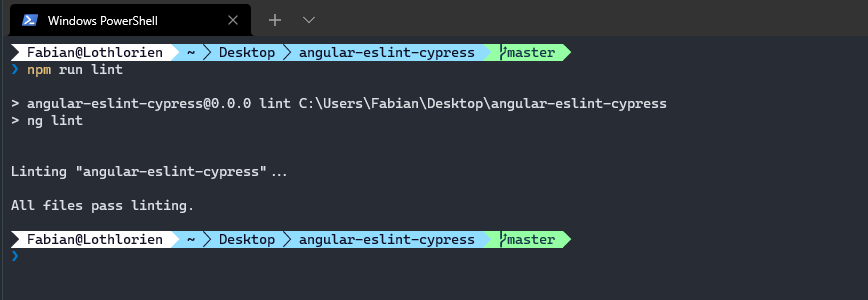
If we now run the npm run lint command, we can see that ESLint is being run.
Speeding up the process
In a project I am working on I found the speed of ESLint pretty slow so I searched around and found the recommendation to introduce a separate tsconfig.eslint.json extending the normal tsconfig.json and only including the ts files.
tsconfig.eslint.json
{
  "extends": "./tsconfig.json",
  "include": ["src/**/*.ts"]
}
In the .eslintrc.json you can now use this file instead of the current one:
{
  "root": true,
  "ignorePatterns": ["projects/**/*"],
  "overrides": [
    {
      "files": ["*.ts"],
      "parserOptions": {
        "project": ["tsconfig.eslint.json"],
        "createDefaultProgram": true
      }
      // ...
    }
    // ...
  ]
}
Removing TSLint
If you have TSLint in your project, you can remove or migrate as mentioned in the video above. This is the cmd to do it. The specific parameters are explained on the GitHub Repo
ng g @angular-eslint/schematics:convert-tslint-to-eslint --remove-tslint-if-no-more-tslint-targets --ignore-existing-tslint-config
Adding Cypress to a project
So there is the end-to-end testing left. For this, we will introduce and use Cypress to rely on the latest tool set and best integration.
We can find the schematic to add Cypress on npm and/or GitHub
We add cypress by executing
ng add @cypress/schematic
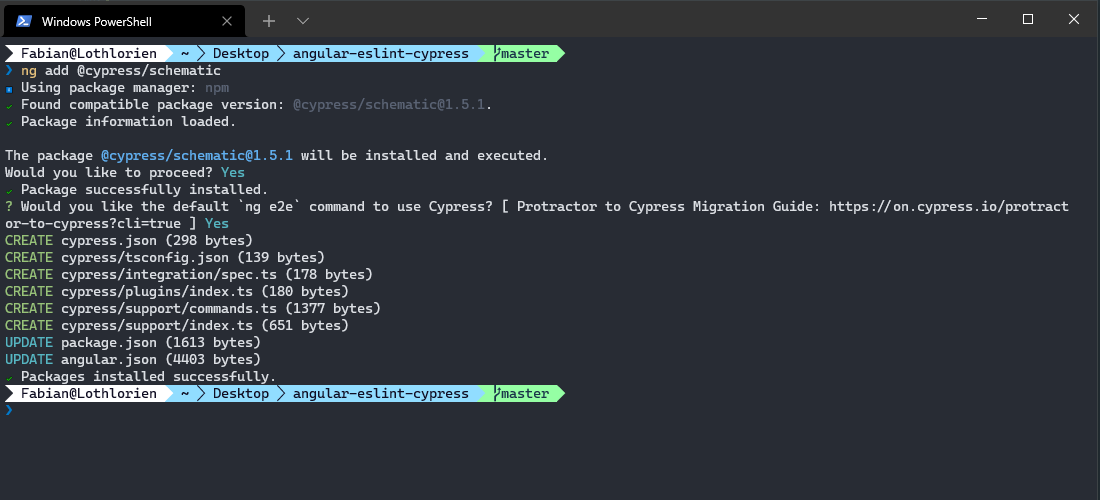
After having done this we find the following changes in our repo:
The package.json has been updated in the scripts and dependencies sections.
package.json
{
  "name": "angular-eslint-cypress",
  "version": "0.0.0",
  "scripts": {
    // ...
    "e2e": "ng e2e",
    "cypress:open": "cypress open",
    "cypress:run": "cypress run"
  },
  "private": true,
  "dependencies": {
    // ...
  },
  "devDependencies": {
    // ...
    "@cypress/schematic": "^1.5.1",
    // ...
    "typescript": "~4.3.5",
    "cypress": "8.5.0"
  }
}
In the angular.json the cypress-run, cypress-open and e2e properties have been added as well.
angular.json
{
  "$schema": "./node_modules/@angular/cli/lib/config/schema.json",
  "cli": {
    // ...
  },
  "version": 1,
  "newProjectRoot": "projects",
  "projects": {
    "angular-eslint-cypress": {
      // ...
      "architect": {
        "build": {
          // ...
        },
        "serve": {
          // ...
        },
        "extract-i18n": {
          // ...
        },
        "test": {
          // ...
        },
        "lint": {
          // ...
        },
        "cypress-run": {
          "builder": "@cypress/schematic:cypress",
          "options": {
            "devServerTarget": "angular-eslint-cypress:serve"
          },
          "configurations": {
            "production": {
              "devServerTarget": "angular-eslint-cypress:serve:production"
            }
          }
        },
        "cypress-open": {
          "builder": "@cypress/schematic:cypress",
          "options": {
            "watch": true,
            "headless": false
          }
        },
        "e2e": {
          "builder": "@cypress/schematic:cypress",
          "options": {
            "devServerTarget": "angular-eslint-cypress:serve",
            "watch": true,
            "headless": false
          },
          "configurations": {
            "production": {
              "devServerTarget": "angular-eslint-cypress:serve:production"
            }
          }
        }
      }
    }
  }
}
If we look at the folder structure a complete cypress folder was added, where our tests can take place, and a cypress.json for the configuration has been added.
.
├── cypress  // <-- Complete Folder was added!
│   ├── integration
│   │   └── spec.ts
│   ├── plugins
│   │   └── index.ts
│   ├── support
│   │   ├── commands.ts
│   │   └── index.ts
│   └── tsconfig.json
├── src
│   └── ...
├── .browserslistrc
├── .editorconfig
├── .eslintrc.json
├── .gitignore
├── angular.json
├── cypress.json  // <-- Was added!
├── karma.conf.js
├── package-lock.json
├── package.json
├── README.md
├── tsconfig.app.json
├── tsconfig.json
└── tsconfig.spec.json
Finishing touches for cypress
To run cypress we have to start the local Angular application on http://localhost:4200 as well and in parallel start the cypress runner to reach the site under where it is living.
We can do this by installing a small http-server https://www.npmjs.com/package/http-server and run it in parallel to either the dist build (cypress:run) or the dev build (cypress:open). To run commands in parallel we can install the package concurrently. Now we can modify the commands as below:
package.json
"cypress:open": "concurrently \"npm start\" \"cypress open\"",
"cypress:run": "npm run build && concurrently \"npm run serve:dist\" \"cypress run\"",
"serve:dist": "http-server ./dist/angular-eslint-cypress -a localhost -p 4200 -c-1"
Summary
In this blog post we saw how we can start an Angular application and add the latest tools of end to end testing and linting to it.
I hope this helped!
Fabian