Chat With Node.js, Socket.io, AngularJS, Flashing Title and Loading Bar
Chat With Node.js, Socket.io, AngularJS, Flashing Title and Loading Bar
In this blog post I want to show you how you can set up a chat with Node.js, socket.io, Angular.js, flashing title and loading bar. We will take a look into the lightweight architecture angular is giving you and how to set up the services and controllers the right way. Additionally we will use the loading-bar-module to give the user information about what his message is doing after sending it and we will flash the homepage title if a new message arrives. The communication is done with socket-io.js and we use jQuery for the basic javascript-things. Enjoy!
Check these links to get all these libs:
- Socket.io (please make sure to use the one from this example. This will work at 100%)
- Loading-bar
- jQuery
Here we go:
Folder-Structure
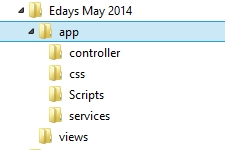
The folder structure in angular.js is, in my opinion, very important because it can give you a nice overview of what you are trying to seperate and is able to encapsulate files, such as services and controllers, etc. in a well regulated way.
So I always make an app-folder which holds all my angular-logic in it and a views folder which encapsulated my views (surprise! ;) ). Within my app folder I have folders for my services, controllers (which are important for the angular-stuff) and for css-files and 3rd-party scripts which is only called “scripts” here. I am trying to do like I would do the namespaces in C#, perhaps you recognized this ;)
The View
Well, to build up a view for a chat client you can do everything you can think of but essentially you only need something which displays the sent messages and you need a button and control where you can send your messages with. This is all for the first shot.
Additionally to this you need to have all your scripts loaded. In the end this looks something like this:
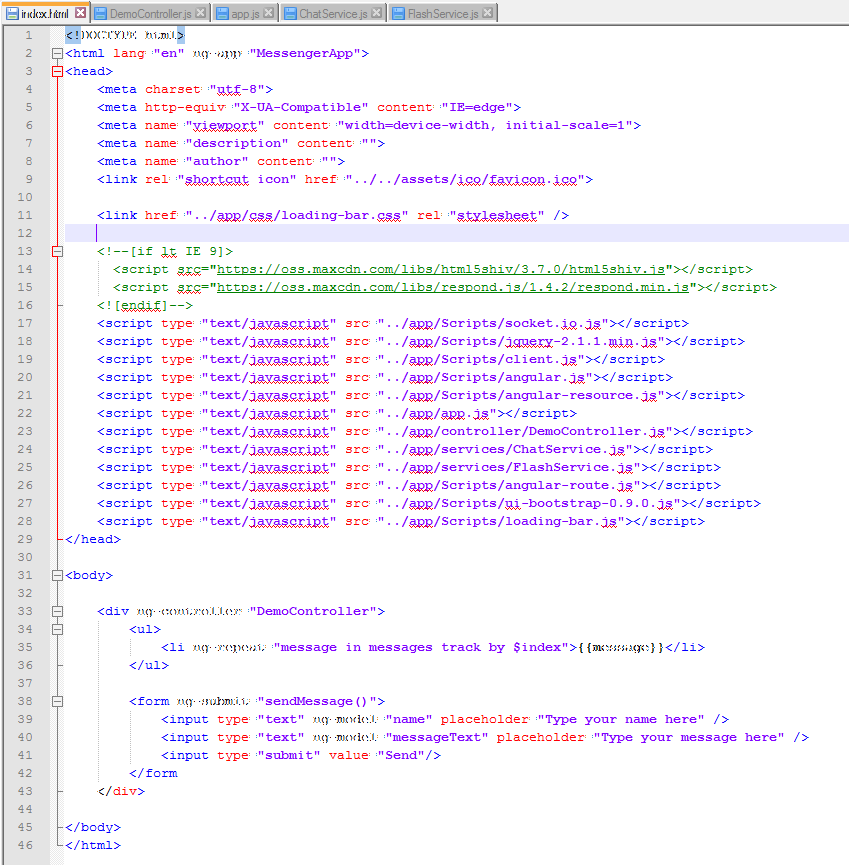
So what we see here is the head-information which is including everything (dont worry, we will get through most of these files during this post) we need to get the things going and the body. The body is giving us a div where we specify the controller “DemoController” and bind the messages we have in a html-list “li” with a angular-statement “ng-repeat”.
Note: You need this “track by $index” as suffix because only with this the message-array can contain the same message multiple times. Without this the message itself would be a key and a key can not occur multiple times. See also here
The form below has a normal submit-action to be called when it gets submitted and we only give the form two input boxes (one for the name and one for the text) including binding it to the (not yet shown) viewmodel. It contains, of course, a button to submit the form. And this is it. You are done with your view.
Lets digg deeper and see the underlying controller. but before we do this, we have to instantiate the whole app with the app.js. Lets take a look at this file first:
App.js
var app = angular.module('MessengerApp', [
  'ngRoute',
  'ngResource',
  'ui.bootstrap',
  'chieffancypants.loadingBar',
]);
app.config(function ($routeProvider) {
  $routeProvider
    .when('', {
      controller: 'DemoController',
      templateUrl: './views/index.html',
    })
    .otherwise({ redirectTo: '/' });
});
Here you can see that we define an app in a variable “app” making it an angular module and we call it “MessengerApp” (This is what you see in the html-opening-tag in the screenshot above). Into this we are including all the 3rd-party-libs I mentioned above (loading-bar and so on). The route provider is not that important because we have one route to show. I wont go into detail here because for this example this would be more theory than practice.
The Controller
As mentioned in the view we have a controller called “DemoController”. And because we instantiated a variable called “app” we can now use it and define a controller on this app:
app.controller(
  'DemoController',
  function ($scope, chatService, cfpLoadingBar, flashService) {
    var _messages = [];

    cfpLoadingBar.start();
    var socket = io.connect('MyIp:MyPort');

    var _sendMessage = function () {
      cfpLoadingBar.start();
      chatService.sendMessage(socket, $scope.name, $scope.messageText);
      $scope.messageText = '';
    };

    socket.on('chat', function (data) {
      $scope.messages.push(data.name + ': ' + data.text);
      $scope.$apply();

      flashService.flashWindow(data.name + ': ' + data.text, 10);
      $('body').scrollTop($('body')[0].scrollHeight);
      cfpLoadingBar.complete();
    });

    $scope.sendMessage = _sendMessage;
    $scope.messages = _messages;
    $scope.messageText = '';
    $scope.name = '';
  }
);
Lets take a look into this in detail: First we define a controller which we can call in the view. Because of the dependency injection angular gives us out of the box we can get everything into our controller we want to use.
Then we make an array of messages and connect to our socket via socket-io. “_sendMessage” is a private function here, which only calls the chatService. The controller further makes UI-Stuff like starting the loading bar and reset the messagetext to an empty string so that the user can enter a new string to send.
The “socket.on(…)”-Method is like an eventhandler from socket.js. It is called when a new message gets received from the server. So everything we do here is :
- Getting the object from the server
- throw this new message into the message array (“$scope.messages.push”)
- giving it to the viewmodel and notify the viewmodel that there is something new (“$scope.$apply();”)
- Flashing the window through a flashservice, we will get to know later
- scroll the body to the bottom so that everytime the latest message is shown in the browser
After we created all our stuf we are ready to fill the scope-object which is given to the view (so its our viewmodel):
$scope.sendMessage = _sendMessage;
$scope.messages = _messages;
$scope.messageText = '';
$scope.name = '';
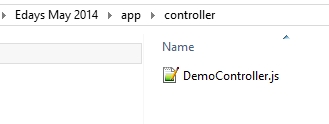
This is the whole controller which is stored under the “Controllers”-folder and included in the view.
The Services
The services are like the base of our application because they are doing the real hard work. Lets take a closer look what these services we included are really doing:
'use strict';
app.factory('chatService', function (chatDataService) {
  var chatService = {};

  var _sendMessage = function (socket, name, stringToSend) {
    return chatDataService.sendMessage(socket, name, stringToSend);
  };

  // public interface
  chatService.sendMessage = _sendMessage;

  return chatService;
});

app.factory('chatDataService', function ($http) {
  var chatDataService = {};

  var _sendMessage = function (socket, name, stringToSend) {
    socket.emit('chat', { name: name, text: stringToSend });
  };

  chatDataService.sendMessage = _sendMessage;

  return chatDataService;
});
And here you can see the seperattion of concerns which I am a big fan of. I divided the data-service from the real service to have a better understanding and a better overview of whom is doing what. So the single-responsibility is used here. So we have the “ChatService” and a “ChatDataService”. We want to look at the real work in the “ChatDataService” which is really sending the messages by calling the method:
socket.emit('chat', { name: name, text: stringToSend });
This line is like doing all the magic using socket.io to send messages to the Server which is described here. We are generating a new object with the properties “name” and “text” and are sending what the user entered.
Due to the fact that the FlashService is only a nice2have-thing I will not refer to it in detail but I want to mention it.
'use strict';
app.factory('flashService', function () {
  var flashService = {};
  var original = document.title;
  var timeout;

  var _cancelFlashWindow = function (newMsg, howManyTimes) {
    clearTimeout(timeout);
    document.title = original;
  };

  var _flashWindow = function (newMsg, howManyTimes) {
    function step() {
      document.title = document.title == original ? newMsg : original;

      if (--howManyTimes > 0) {
        timeout = setTimeout(step, 1000);
      }
    }

    howManyTimes = parseInt(howManyTimes);

    if (isNaN(howManyTimes)) {
      howManyTimes = 5;
    }

    _cancelFlashWindow(timeout);
    step();
  };

  flashService.flashWindow = _flashWindow;
  flashService.cancelFlashWindow = _cancelFlashWindow;

  return flashService;
});
This service is offering us two methods
- flashService.flashWindow = _flashWindow; //Flashes the window with a message and a number of how many times the title shall flash
- flashService.cancelFlashWindow = _cancelFlashWindow; // is only cancelling the flash-progress
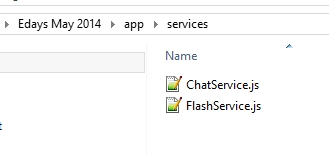
To show you how this looks like in the file/folder-structure, see here:
So this was it. This is all you need to get a chat client going. If you include all the angular-files and giving the client the correct IP I am sure you will get the chat going in a second. (Dont forget to load the server) Thanks for reading.
Fabian